Are you ready to boost your website’s engagement and connect with your audience more effectively? Look no further! In this step-by-step guide, we’ll walk you through the process of adding Mailchimp Embedded Signup Form to your website. Whether you’re a seasoned web developer or a newbie, follow these simple instructions to seamlessly integrate a sign-up form that captures leads and grows your subscriber list.
1. Create Your Mailchimp Account
Before diving into the technical details, let’s set the stage. If you haven’t already, sign up for a free Mailchimp account. It’s user-friendly and packed with powerful features to supercharge your email marketing efforts. As you progress, you have the option to upgrade to more comprehensive packages, but rest assured, you can certainly kickstart the process for free.
2. Log In and Access Your Audience
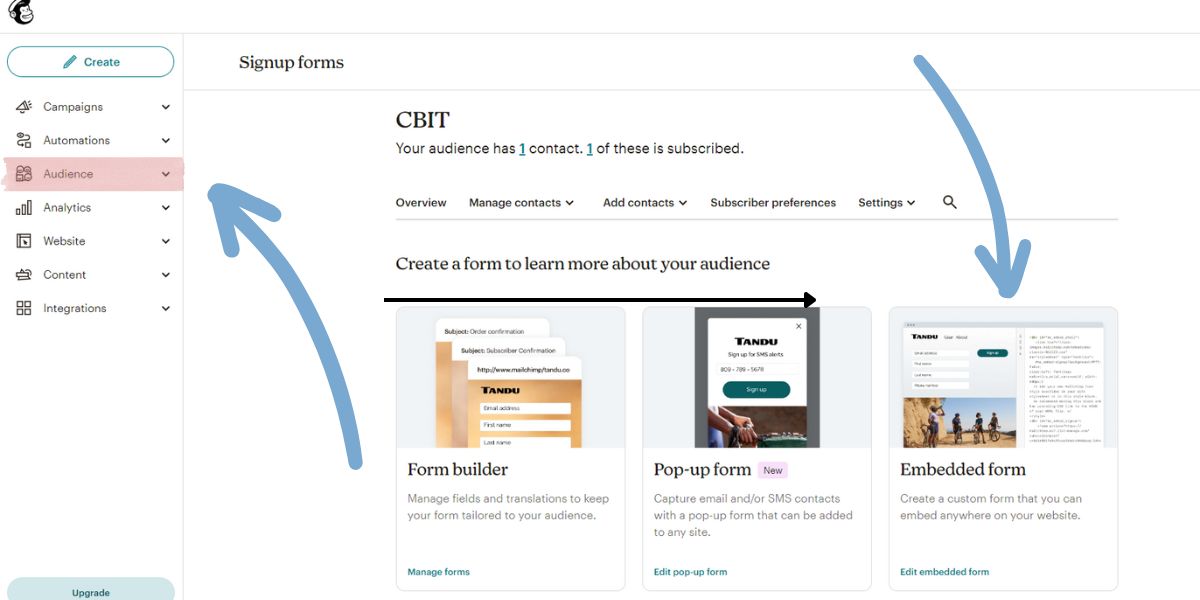
Once you’re logged in, navigate to your Mailchimp dashboard. Click on “Audience” in the top menu. Here, you’ll manage your subscribers and create custom lists. If you haven’t set up an audience yet, click “Create Audience” and follow the prompts.
3. Design Your Mailchimp Embedded Signup Form
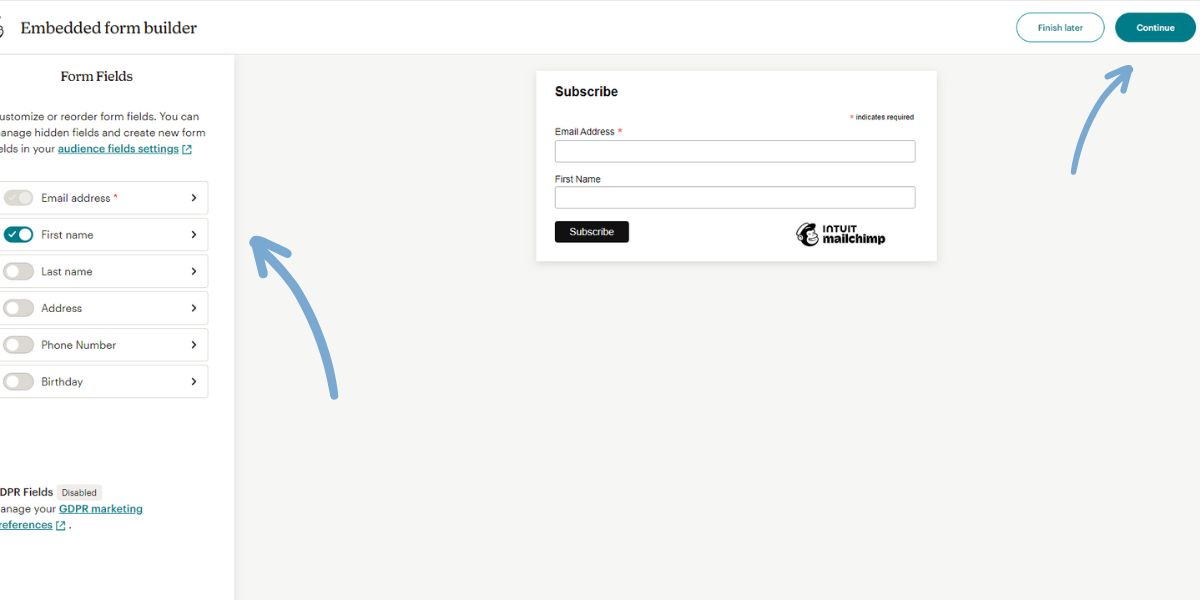
Now, let’s get creative! Click on your audience name and select “Signup forms” from the dropdown. Choose the “Embedded forms” option. Customize the Mailchimp Embedded Signup Form by selecting:
- Form Fields – like “First Name,” “Last Name,” and “Email Address.” Customize or reorder form fields. You can manage hidden fields and create new form fields in your audience fields settings
- Settings – Set the form title and width of the form box as well as a few other available settings.
- Tags – When you get responses to this form, any tags you choose here will be automatically applied to the form contacts. Learn how to get started with tags.
- Referral Badge – Mailchimp’s Referral program lets you earn bill credits when you refer new paying customers to Mailchimp. Learn more about Mailchimp’s Referral badge program here. You need to upgrade from the free package to be able to remove Mailchimp branding from your forms, email, and landing pages.
4. Grab the Embed Code for your Mailchimp Embedded Signup Form
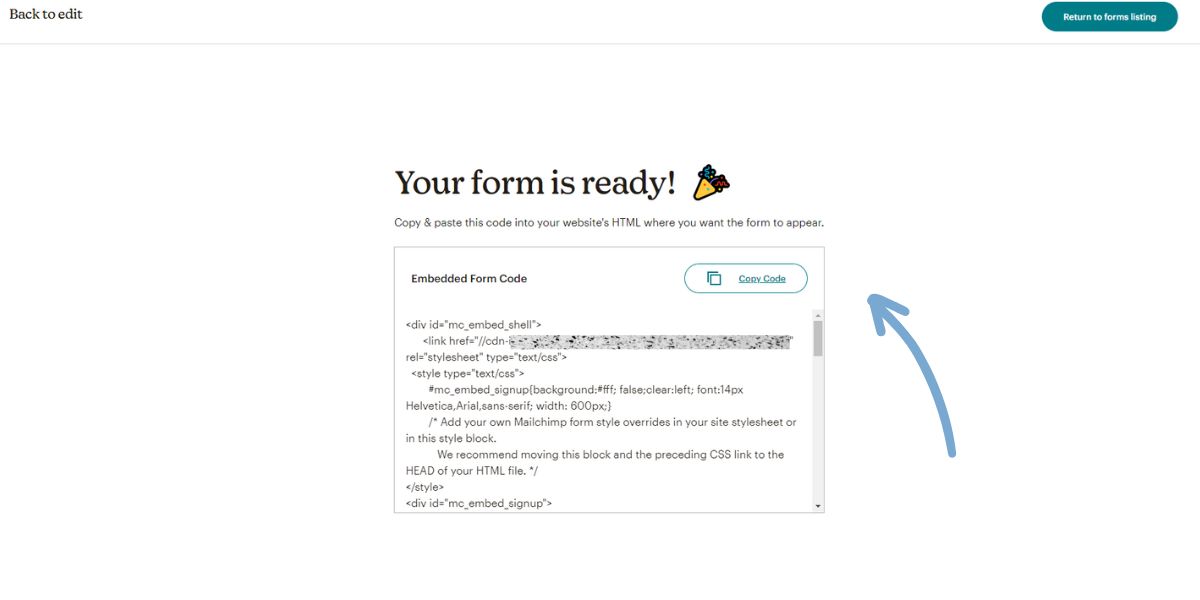
Here comes the magic! Mailchimp generates an embed code for your customized form. Click on the continue button and then Click on “Copy Code” to save it to your clipboard. This code snippet will seamlessly integrate the signup form into your website.
5. Add the Mailchimp Embedded Signup Form to Your Website
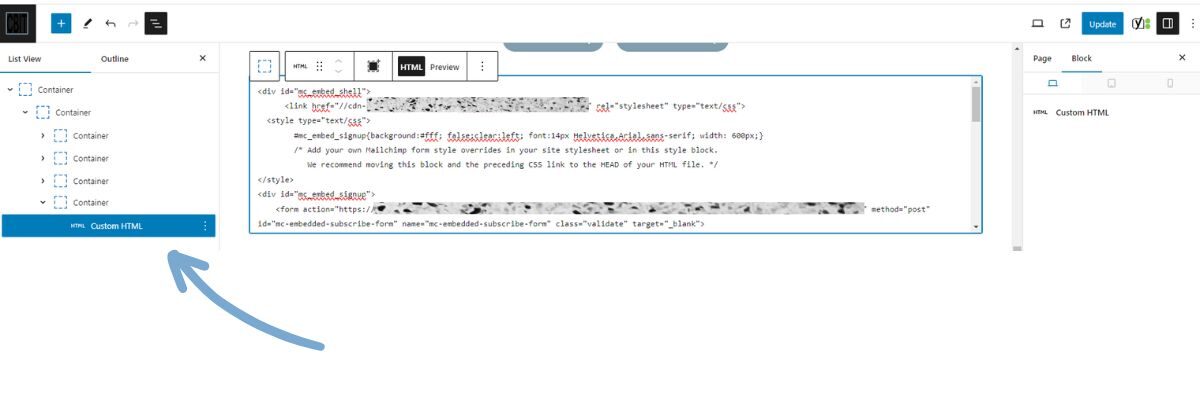
Now, head over to your website’s content management system (CMS). Create a new page or locate an existing one where you want the form to appear. In your CMS editor, switch to HTML mode and paste the embed code where you’d like the form to display.
6. Test and Launch your Mailchimp Embedded Signup Form
Before hitting the publish button, preview your page. Make sure the form looks sleek and functions smoothly. Test it by submitting a sample email address. Once you’re satisfied, hit “Publish” and watch those subscribers roll in!
Remember, an Mailchimp Embedded Signup Form form is a powerful tool to engage your audience, build relationships, and drive conversions. With Mailchimp, you’re not just collecting emails; you’re nurturing connections that can lead to long-term success. Happy form-building! 🌟📧
